Snowflake
Connect your Snowflake account to Floqer using Snowflake OAuth or key-pair authentication.
Before you begin
You will need:
- Your Snowflake account identifier, such as
acme-prod - A Snowflake administrator to configure the connection
- The warehouse, database, schema, and tables Floqer should access
Enter the account identifier only—not your full Snowflake URL. Both authentication methods use the same scoped Snowflake role.
1. Grant Floqer access
Create a role for Floqer and grant only the access your workflows need. Replace the example names below with your Snowflake objects and remove grants for features you will not use.
USE ROLE USERADMIN;
CREATE ROLE IF NOT EXISTS FLOQER_ROLE;

USE ROLE SECURITYADMIN;
GRANT USAGE ON WAREHOUSE FLOQER_WH TO ROLE FLOQER_ROLE;
GRANT USAGE ON DATABASE GTM_DB TO ROLE FLOQER_ROLE;
GRANT USAGE ON SCHEMA GTM_DB.PUBLIC TO ROLE FLOQER_ROLE;

-- Import data
GRANT SELECT ON TABLE GTM_DB.PUBLIC.INPUT_TABLE TO ROLE FLOQER_ROLE;

-- Insert rows
GRANT INSERT ON TABLE GTM_DB.PUBLIC.INSERT_TARGET TO ROLE FLOQER_ROLE;

-- Upsert rows
GRANT INSERT, UPDATE ON TABLE GTM_DB.PUBLIC.UPSERT_TARGET TO ROLE FLOQER_ROLE;
GRANT CREATE FILE FORMAT ON SCHEMA GTM_DB.PUBLIC TO ROLE FLOQER_ROLE;
FLOQER_ROLE is the permission boundary for the connection. Floqer does not require an administrator role or permission to delete Snowflake data.
Connect with Snowflake OAuth
OAuth connects Floqer as an existing Snowflake user.
1. Assign the role
USE ROLE SECURITYADMIN;
GRANT ROLE FLOQER_ROLE TO USER YOUR_USERNAME;
ALTER USER YOUR_USERNAME SET DEFAULT_ROLE = FLOQER_ROLE;
2. Create the OAuth integration
Run the following as ACCOUNTADMIN:
CREATE OR REPLACE SECURITY INTEGRATION FLOQER_INTEGRATION
  TYPE = OAUTH
  ENABLED = TRUE
  OAUTH_CLIENT = 'CUSTOM'
  OAUTH_CLIENT_TYPE = 'CONFIDENTIAL'
  OAUTH_REDIRECT_URI = 'https://app.floqer.com/snowFlakeauth'
  OAUTH_ISSUE_REFRESH_TOKENS = TRUE
  OAUTH_REFRESH_TOKEN_VALIDITY = 7776000
  OAUTH_ACCESS_TOKEN_VALIDITY = 1800
  OAUTH_USE_SECONDARY_ROLES = NONE
  ALLOWED_ROLES_LIST = ('FLOQER_ROLE');
The redirect URI is case-sensitive and must be entered exactly as shown.
Note
Troubleshooting — Privileged Roles Error
If you encounter an error after creating the integration related to privileged roles, run the following two queries:
DESC SECURITY INTEGRATION FLOQER_INTEGRATION;ALTER ACCOUNT SET OAUTH_ADD_PRIVILEGED_ROLES_TO_BLOCKED_LIST = FALSE;This is required when your Snowflake account has ACCOUNTADMIN or other privileged roles that are blocked from OAuth by default.
3. Retrieve your client credentials
SELECT SYSTEM$SHOW_OAUTH_CLIENT_SECRETS('FLOQER_INTEGRATION');Copy the OAUTH_CLIENT_ID and OAUTH_CLIENT_SECRET values and store the client secret securely.
4. Connect in Floqer
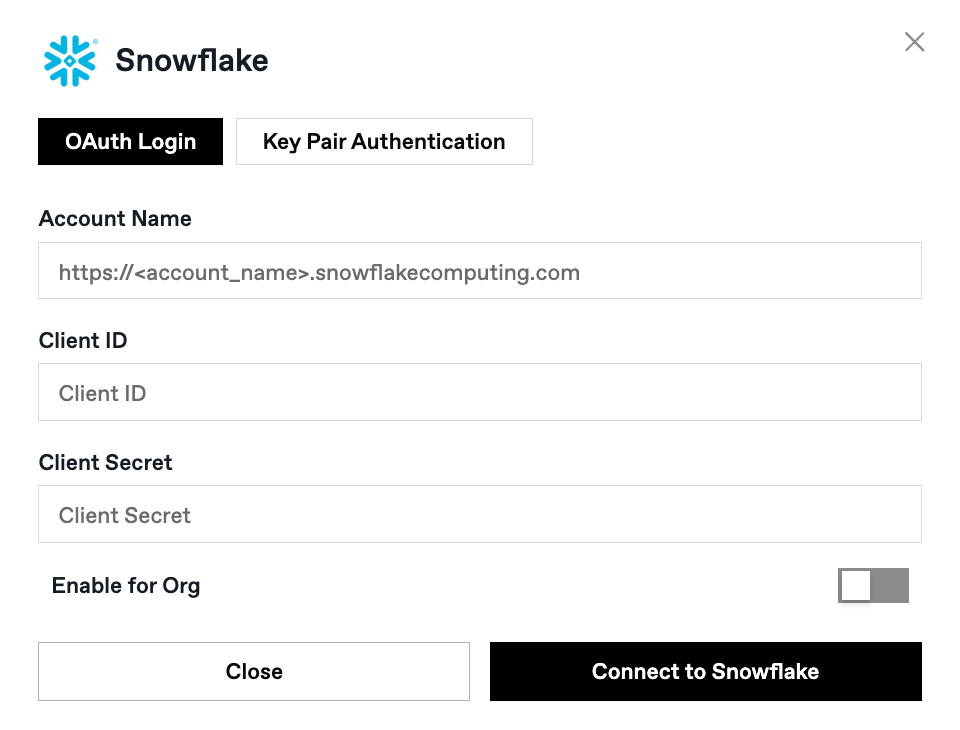
- Go to Connections → Snowflake and select OAuth Login.
- Enter your account identifier, client ID, and client secret.
- Turn on Enable for Org if the connection should be available to your workspace.
- Click Connect to Snowflake, then sign in to Snowflake when redirected.
Connect with key-pair authentication
Key-pair authentication connects Floqer through a dedicated Snowflake service user.
1. Create the service user
USE ROLE USERADMIN;
CREATE USER IF NOT EXISTS FLOQER_SERVICE
  TYPE = SERVICE
  DEFAULT_ROLE = FLOQER_ROLE
  DEFAULT_SECONDARY_ROLES = ()
  DEFAULT_WAREHOUSE = FLOQER_WH;

USE ROLE SECURITYADMIN;
GRANT ROLE FLOQER_ROLE TO USER FLOQER_SERVICE;
2. Generate and register the key pair
Run these commands on a trusted machine:
openssl genrsa 2048 | openssl pkcs8 -topk8 -v2 des3 -inform PEM -out rsa_key.p8
openssl rsa -in rsa_key.p8 -pubout -out rsa_key.pub
Remove the BEGIN and END lines and all line breaks from rsa_key.pub, then register the remaining public-key value:
USE ROLE USERADMIN;
ALTER USER FLOQER_SERVICE ADD KEY PAIR FLOQER_KEY
  PUBLIC_KEY = '<single-line public key value>'
  ROLE_RESTRICTION = 'FLOQER_ROLE';
Keep rsa_key.p8 and its passphrase secure. Floqer needs the complete PKCS#8 private key, including its BEGIN and END lines.
3. Connect in Floqer
- Go to Connections → Snowflake and select Key Pair Authentication.
- Enter your account identifier and
FLOQER_SERVICEas the username. - Paste the complete contents of
rsa_key.p8and enter its passphrase. - Turn on Enable for Org if the connection should be available to your workspace.
- Click Connect to Snowflake.
After connecting
Floqer shows only the Snowflake objects available to FLOQER_ROLE. If an object is missing, confirm the role has USAGE on its warehouse, database, and schema, plus the required permission on the table or view.
To revoke access, remove FLOQER_ROLE from the user or disable the OAuth integration or service user, then delete the connection in Floqer.
If you need help, contact hello@floqer.com.